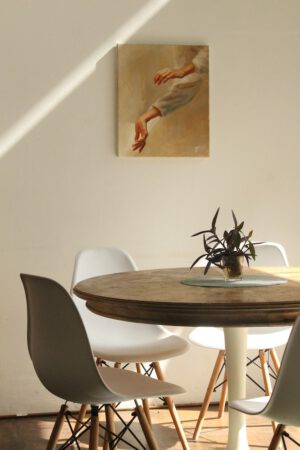
Interior painting and drywall repair often go hand in hand, as freshening up your walls can also reveal imperfections that need to be addressed. Whether you’re preparing to repaint a room or simply want to fix up some wear and tear, this step-by-step guide will walk you through the process of achieving a flawless finish.
Introduction
Interior painting can breathe new life into your home ,drywall repair to start with a smooth, well-prepared surface. This guide will cover both the painting process and the necessary steps for repairing any drywall damage you may encounter along the way. By following these steps, you can ensure that your paint job looks professional and lasts for years to come.
Assess the Condition of the Walls
Before you begin painting, take some time to assess the condition of the walls. Look for any cracks, holes, or other imperfections that need to be repaired before painting. This is also a good time to clean the walls to remove any dirt, grease, or stains that could affect the paint’s adhesion.
Gather Your Materials and Tools
To paint and repair drywall effectively, you’ll need the interior painting and tools:
- Paint: Choose a high-quality interior paint in the color of your choice.
- Primer: Primer helps the paint adhere to the surface and provides a more even finish.
- Drywall compound: Also known as joint compound or spackle, this is used to fill in cracks, holes, and other imperfections in the drywall.
- Sandpaper: Use fine-grit sandpaper to smooth out the drywall compound and prepare the surface for painting.
- Paintbrushes and rollers: Select brushes and rollers appropriate for the type of paint you’re using and the size of the area you’ll be painting.
- Drop cloths or plastic sheeting: Protect your floors and furniture from paint spills and splatters with drop cloths or plastic sheeting.
- Painter’s tape: Use painter’s tape to mask off trim, windows, and other areas you don’t want to paint.
Repairing Drywall: Step-by-Step Guide
- Prepare the Area: Clear away any furniture or decorations from the walls and lay down drop cloths or plastic sheeting to protect the floor. Use painter’s tape to mask off any trim, windows, or other areas you don’t want to paint.
- Assess and Repair Drywall Damage: Inspect the walls for any cracks, holes, or other imperfections. Use a utility knife to cut away any loose or damaged drywall, then fill in the damaged areas with drywall compound. Apply the compound with a putty knife, smoothing it out evenly and feathering the edges.
- Let it Dry: Allow the drywall compound to dry completely according to the manufacturer’s instructions. This may take several hours or overnight, depending on the thickness of the compound and the humidity levels.
- Sand the Surface: Once the drywall compound is dry, use fine-grit sandpaper to smooth out any rough spots or excess compound. Sand the repaired areas until they are flush with the surrounding wall, taking care not to sand too aggressively.
Painting: Step-by-Step Guide
- Prime the Walls: Before painting, apply a coat of primer to the walls to help the paint adhere and provide a more even finish. Use a paintbrush to cut in around the edges and corners, then use a roller to apply primer to the larger areas of the wall.
- Paint the Walls: Once the primer is dry, it’s time to paint. Stir the paint thoroughly before applying it to the walls, then use a paintbrush to cut in around the edges and corners. Use a roller to apply paint to the larger areas of the wall, working in small sections and overlapping the edges slightly for a seamless finish.
- Apply Additional Coats (if necessary): Depending on the color and coverage of the paint, you may need to apply multiple coats for the best results. Allow each coat to dry completely before applying the next, and sand lightly between coats to smooth out any imperfections.
- Remove Painter’s Tape and Clean Up: Once the final coat of paint is dry, carefully remove the painter’s tape from the trim, windows, and other masked-off areas. Touch up any areas where the tape pulled away paint, then clean up any paint spills or splatters with a damp cloth.
Conclusion
By following this step-by-step guide, you can achieve professional-looking results when painting your interior walls and repairing any drywall damage along the way. Taking the time to properly prepare the walls and use the right materials and techniques will ensure that your paint job looks flawless and stands the test of time. So roll up your sleeves, gather your supplies, and get ready to transform your space with a fresh coat of paint and smooth, repaired walls.

